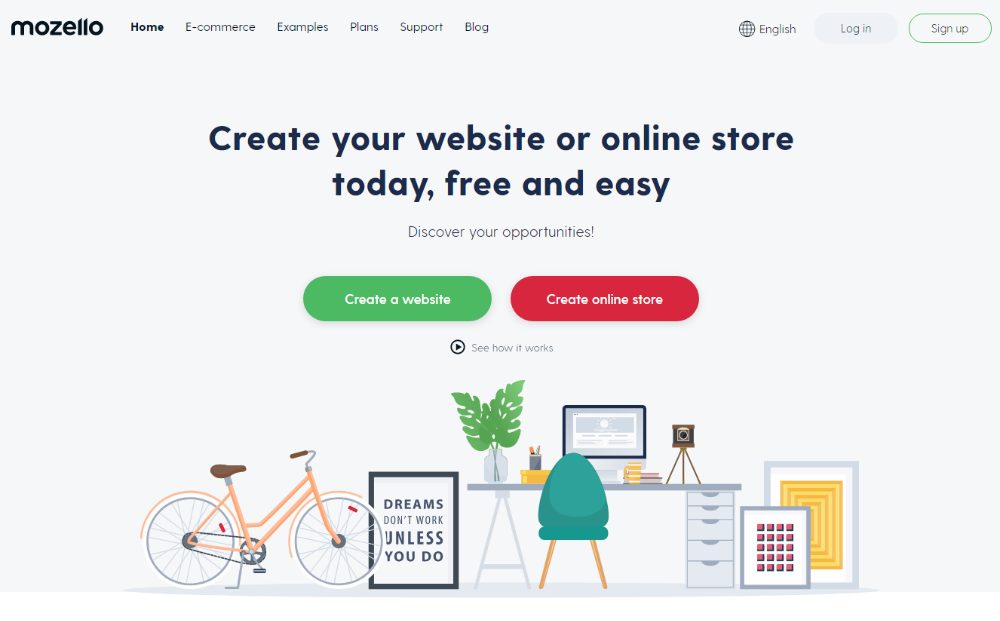
Using Mozello to create an online store is easy, and it’s free. The ecommerce site builder offers dozens of mobile-friendly site templates to get you started with your online store design. Its WYSIWYG editor lets you change or add with just a click, and you’ll see the changes immediately.
Mozello is a unique ecommerce website builder that lets you sell products on a subdomain for free or on a custom domain for a low monthly price. Unlike most ecommerce site builders, it lets you create your site in one of dozens of languages and lets you accept payments via PayPal and wire transfer.
Step 1: Sign Up for a Mozello Account
Mozello makes it easy to start creating your ecommerce site—just click on the button on the homepage.
To get started, choose a website or online store. In this example, we’ve chosen to create an online store, so you can see how to add products and adjust specific settings.
You don’t even need to enter payment information to your account—Mozello’s free ecommerce store option is absolutely free.
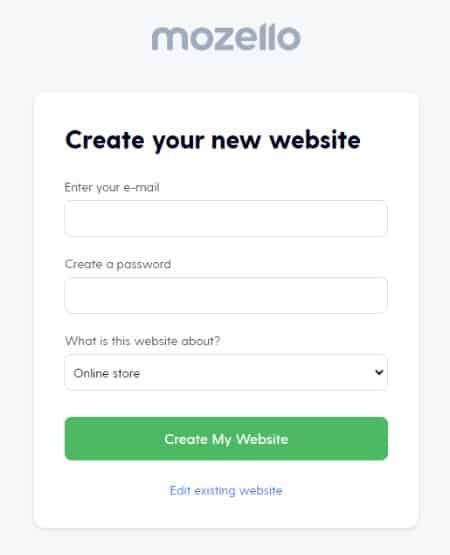
Next, you’ll fill out the form with your email address, create a password, and choose online store. Other options include a website, blog, or other. These won’t change your template options or anything though, so it doesn’t really matter which you choose.
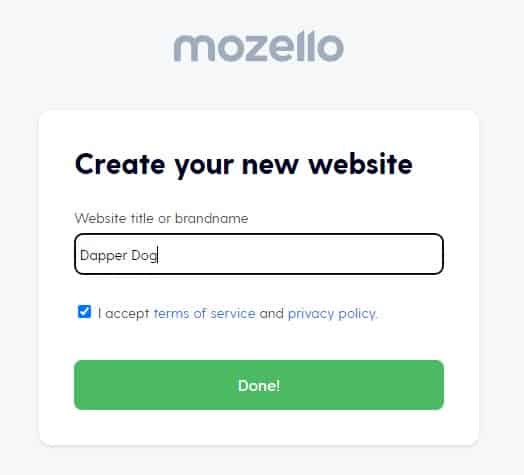
Enter your business name for your website or a variation on your brand.
On the next screen, you’ll need to name your website. Use your business’ name here or whatever URL you want for your site. This will give you a subdomain of Mozello’s site, so your website will be named yoursite.mozellosite.com. If you have a custom domain, you can use that when you finish signing up.
Tip: If you’re looking for specific options with a free plan, check out the best free ecommerce website builders. Mozello makes the list as the best for international sellers, but you may need something more suited for a WordPress site or an open-source option.
Step 2: Choose a Template & Design Your Website

Mozello’s website templates are simple and customizable, so they’re a great starting point for any beginner.
Mozello offers four dozen ecommerce website templates from which you can choose. Similar to some of the best website builders, Mozello is flexible enough that you can change your design later if you don’t like the one you choose now.
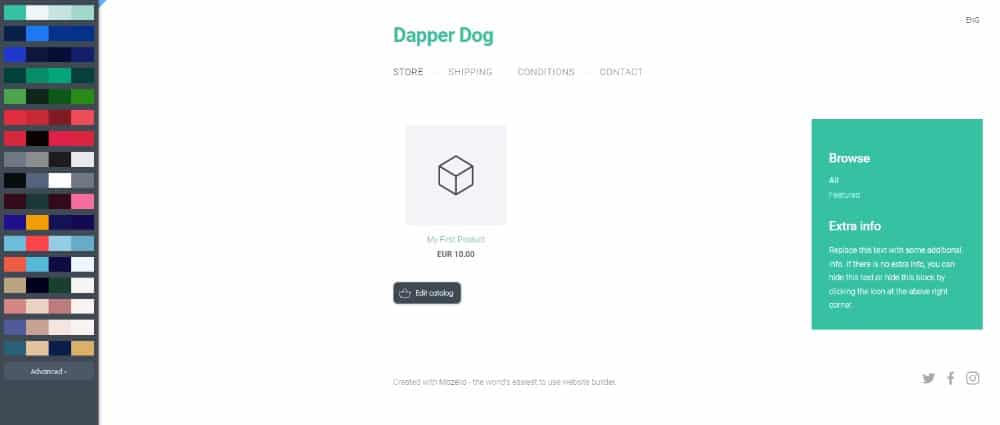
You can change the color scheme of your whole Mozello site any time by choosing the colors from the left-hand menu.
You can skip ahead to step 3 and start adding products, or you can customize the look of your site and online store by just clicking on a page where you want to modify text or images. From the left-hand menu, you can change the color and font scheme, and add pages.
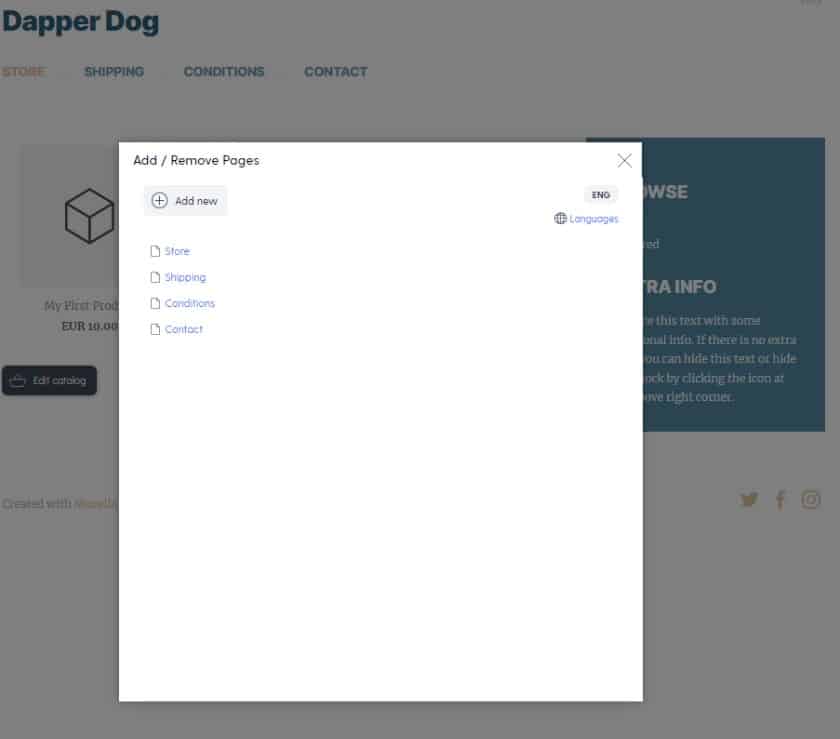
You can add or edit any page on your site and simply drag the pages in this window to rearrange the order.
To create a homepage, click on Pages at the top left and choose “front page or special page.” The name of this page is “Home” by default, but you can change it to whatever you’d like (including the slug). Click on “advanced settings” to add a meta description and title tag, which will show up when someone finds your website in search results. After you fill out this info, you can choose the layout you like best, add photos, and add details about your online store.
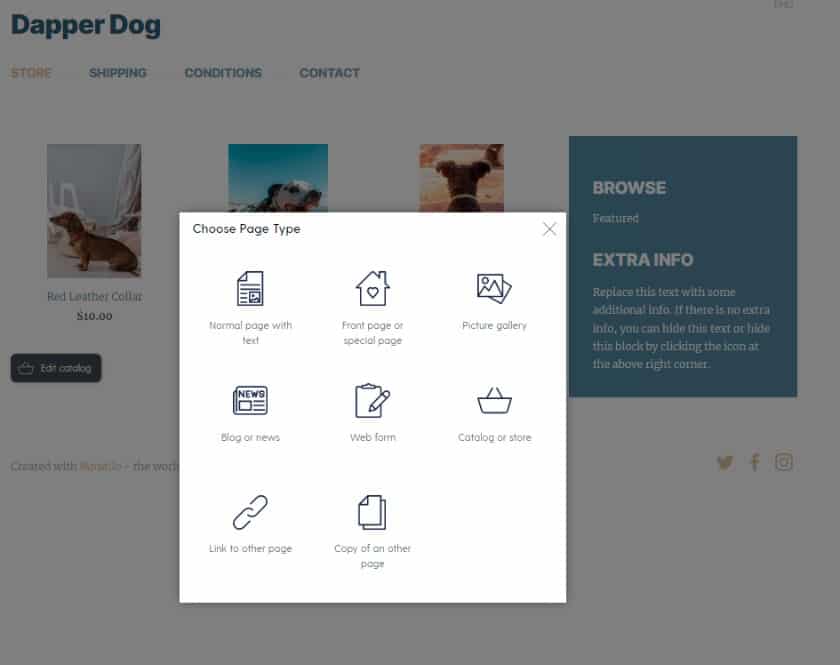
When you add a homepage, be sure to choose “Front page or special page.”
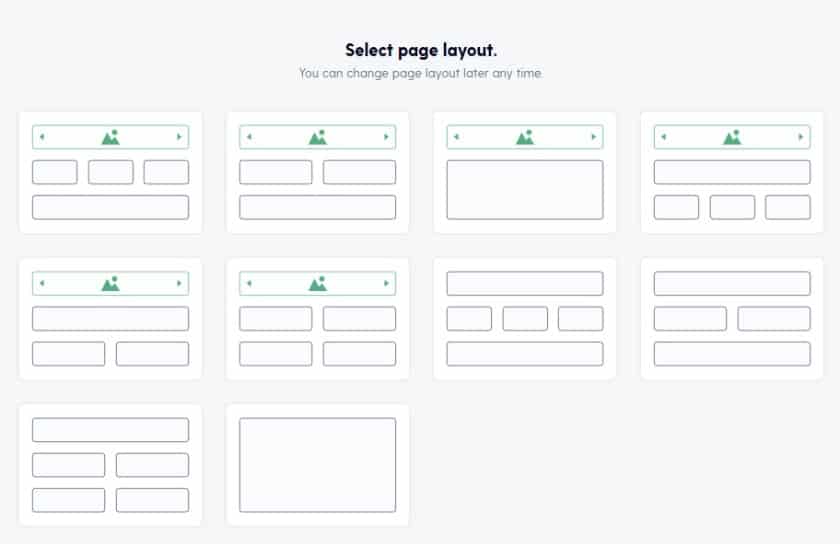
After you create a homepage on your Mozello site, you can choose the layout you like best.
Many features aren’t available on the free plan, so it can be a bit limiting. For example, if you want to change your favicon (the small image that shows up next to your URL) or want to remove Mozello branding, you’ll need to upgrade to a paid plan.
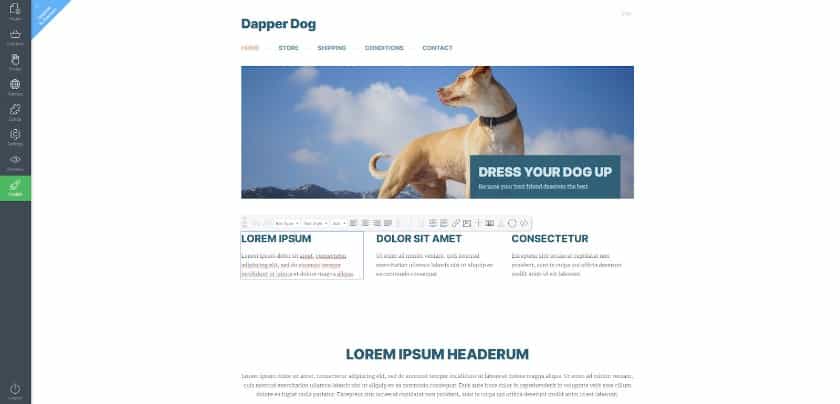
Edit your homepage just by clicking on the section you want to change.
Step 3: Add Products to Your Store Page
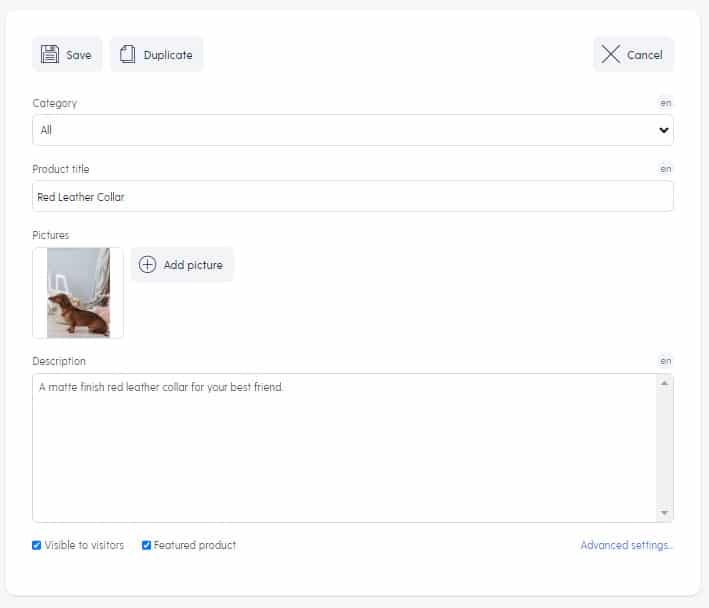
Click on each product option to add your own photos, title, and description.
If you haven’t already filled out your store page with the products you’re selling, now is a good time to do that. Simply click on one of the products on the store template page to open a new window where you can upload an image and add a description and the title of the product. You can also adjust the pricing under advanced settings for each product.
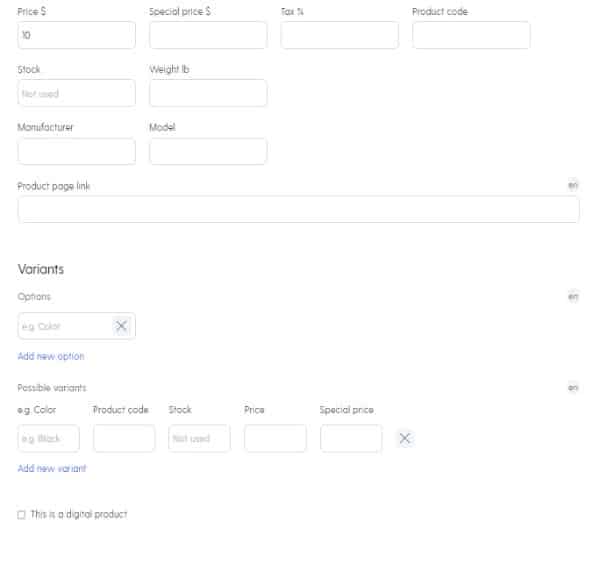
Under advanced settings, you can change the price of each product and add model numbers, the product page link, and variants, if applicable.
The free plan limits your storage space to 500MB and five products in your store, so make sure you size your photos accordingly. To get more space and the ability to add more products to your store, choose one of the paid plans—the $8-per-month plan gives you 50GB of storage and lets you list up to 15 products; the $18-per-month option removes both storage space and product limits.

Add your payment account details to ensure you get paid for every order—Mozello is one of the few ecommerce site builders that lets you accept wire payments.
Regardless of which plan you choose, you can accept payments via PayPal, cash, or wire transfer. You can add your payment details under catalog settings. This is also where you can set up payments for credit cards, but for this option, you need to sign up for Mozello’s Premium Plus plan.
Step 4: Adjust Delivery & Shipping Settings
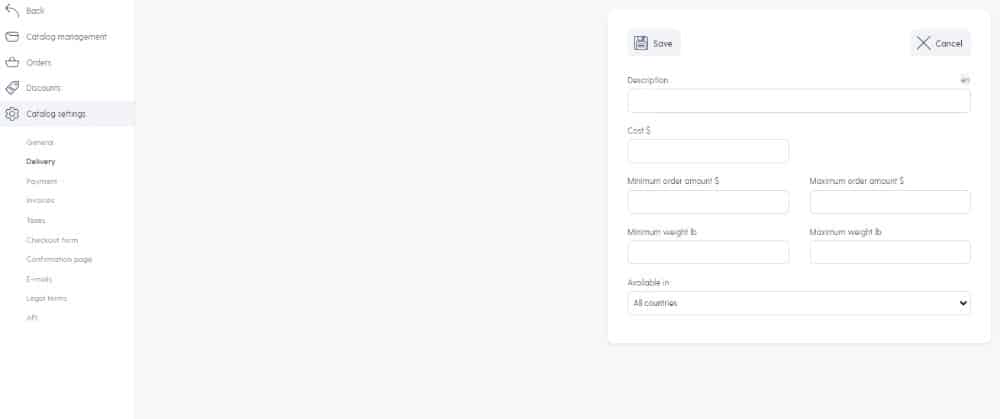
You can create different delivery options with rules based on weight or minimum order, for example.
Adjusting settings is easy enough in Mozello, but it isn’t intuitive. You’ll need to go to “Catalog” on the left menu and then “Catalog settings” to change various aspects. Add delivery options to ensure customers pay for shipping and include which countries you’ll ship to, along with minimum and/or maximum order amount and weights. There’s no real-time shipping option on Mozello, regardless of which plan you choose.
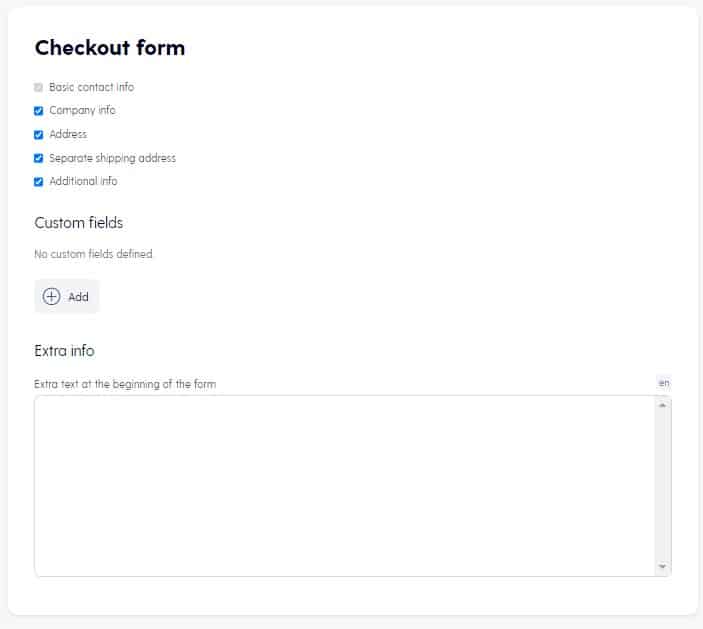
Every customer that checks out will need to add the information you require, such as address and basic contact info. Custom fields are only available on the top-tier plan.
Be sure to customize your checkout form for customers, too. You can add or remove the fields you prefer, but to add any custom fields, you’ll need to upgrade your plan to the top-tier Mozello plan.
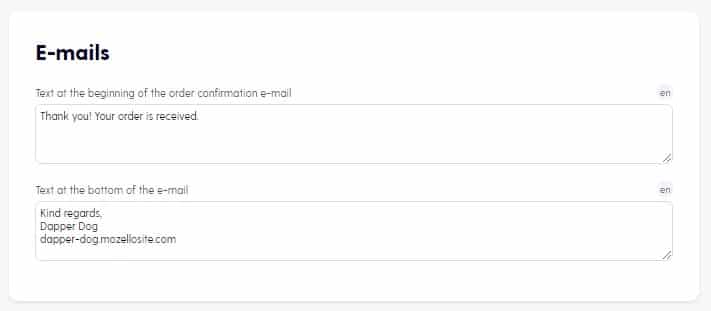
Customers will get a confirmation email after an order. You can only edit the text of the email if you’re on the top-tier paid plan.
Mozello offers a feature to automatically send an email confirmation to a customer after a purchase. The free account sends a generic email, but those opting for the Premium Plus plan can change the text of the confirmation email.
Step 5: Publish Your Site
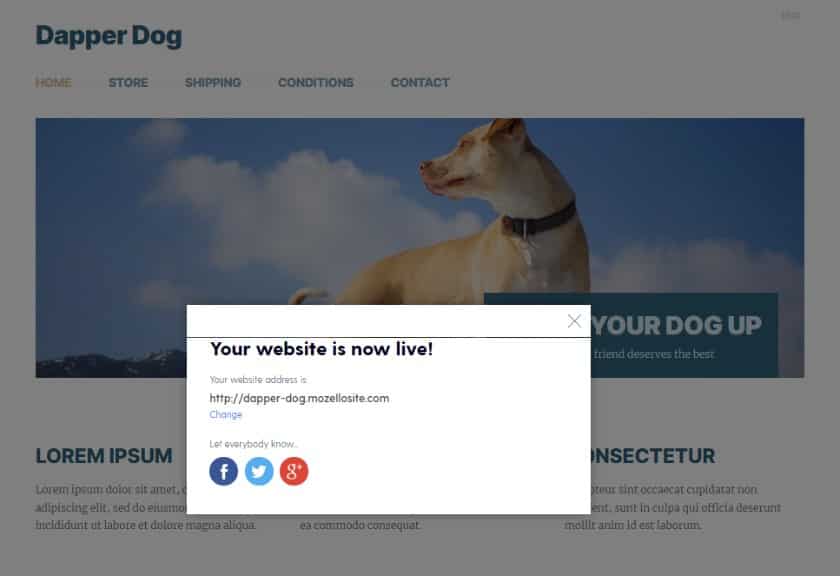
After you publish your site, Mozello confirms your site is live.
Once you’re satisfied with the look of your site, the products in your online store, and your settings, it’s time to publish—simply click on “Publish” at the bottom of the left-side menu and your site will automatically launch.
If you’ve chosen a paid plan to use a custom domain, you’ll see your website without the “mozellosite” subdomain. If you’re using the free plan, you’ll see Mozello branding at the bottom of each page.
Frequently Asked Questions (FAQs)
How does Mozello work?
Mozello lets you set up a website or online store for free using its subdomain for your URL or for a low monthly fee using a custom domain. Either one lets you sell products or services and accept online payments. If you choose a paid plan, you’ll have more customizability and more options, such as removing Mozello branding and using a payment processor, like Stripe. Mozello is easy to use and includes dozens of templates to help you get started.
What is the best free website builder?
If you’re not looking to build an online store for free and rather just a website for your small business or blog, consider checking out the best free website builders. Wix, Weebly, and Square all make the list as the top website builders because they offer design flexibility and low-cost plans when you’re ready to grow.
Bottom Line
Once you learn how to set up a Mozello online store, you’ll see why it’s an ideal option for international sellers—you can create an ecommerce website in one of 60 different languages. Even if that’s not relevant to you, it’s a good option for creating a free online store, and you can accept payments via PayPal or wire transfer.
You May Also Like …
- Creating an online store starts with a concept and sourcing products before you choose the best ecommerce platform.
- If you’re ready to expand your online store to a brick-and-mortar retail business, there are some specific steps you should follow.
- Stocking your inventory (virtually or physically) requires you to find the right wholesalers for your retail business.